How to Manage Multiple Social Media Accounts Without Chaos
·Updated ·17 min read

You open Facebook to publish a campaign post, switch to Instagram to adjust the crop, jump to LinkedIn for a client approval, then discover that the version in your shared folder isn't the version anyone signed off. By midmorning, you've answered comments from one account, missed a message on another, and still haven't checked whether yesterday's scheduled post went live.
That routine doesn't mean you need to work faster. It means your workflow has no operating system. Learning how to manage multiple social media accounts reliably requires more than a scheduler. You need a clean account map, controlled queues, clear handoffs, platform-aware assets, and a recovery process for the moments when publishing doesn't go as planned.
Why Managing Multiple Accounts Feels Chaotic and How a System Fixes It
A social media manager handling several clients rarely struggles because writing one caption is difficult. The strain comes from repeated context switching. Each account has a different audience, voice, approval path, media format, and publishing window. Opening each native app separately makes it easy to select the wrong profile, paste an outdated caption, or assume a post published when it failed.
The workload is now spread across several profiles for many teams. A 2026 analysis of 12,291 users managing social channels found that brands handled an average of 4.5 social media accounts, while nearly 61% managed at least three accounts and 17% managed seven or more. The same analysis found that 6.4% managed 11 or more accounts, with most audience growth in 2025 occurring on Facebook, Instagram, X, and LinkedIn. ( Social Media Report)

The real cost of switching between apps
Native apps still matter for some tasks, especially detailed community replies, platform-specific features, and final live checks. They become inefficient when they serve as your entire planning system. A manager who moves account by account tends to repeat the same work:
- Rebuild context: Recheck the brand voice, campaign objective, and audience before each post.
- Duplicate decisions: Decide separately where, when, and how to publish the same campaign.
- Lose ownership clarity: Rely on memory to know whether a draft needs approval or is ready to schedule.
- Hide failures: Notice a missing post only after someone else reports it.
Centralization solves the switching problem, but centralization alone isn't enough. A shared dashboard without naming rules, approvals, or monitoring can turn into a crowded room where nobody knows who changed the caption.
Practical rule: Use one system to plan and publish, but keep a human owner responsible for every live post.
What a mature workflow looks like
A dependable multi-account process moves in a visible sequence:
- Account map: Every profile has a purpose, owner, access method, and workspace.
- Content plan: Campaigns, evergreen posts, reactive opportunities, and platform adaptations have defined places.
- Draft and review: Creators, approvers, and publishers know when responsibility changes hands.
- Platform-aware publishing: The system handles different captions, crops, media types, and timing rules.
- Live verification: Someone checks important posts after publication.
- Performance review: The team separates account signals from business outcomes and records the next actions.
Early guidance on multi-account management already recommended dashboards, advance scheduling, and breaking work into manageable batches. More recent guidance describes a cadence of daily monitoring, weekly analysis, and monthly reporting, showing how the work has evolved from simple posting into a repeatable operating system. ( Entrepreneur's guidance on managing multiple social media accounts)
A system won't remove every interruption. It will make interruptions visible, assignable, and recoverable. That difference is what prevents a busy morning from becoming an all-day scramble. A useful social media management workflow should make the next action obvious, whether the post is waiting for approval, scheduled for publication, or flagged for repair.
Audit and Organize Every Account Before You Schedule Anything
Scheduling before auditing is how teams create polished mistakes. Before connecting a tool, build an account register that shows what exists, who controls it, and why it should remain active. The register becomes the reference point for every later decision about workspaces, permissions, campaigns, and reports.
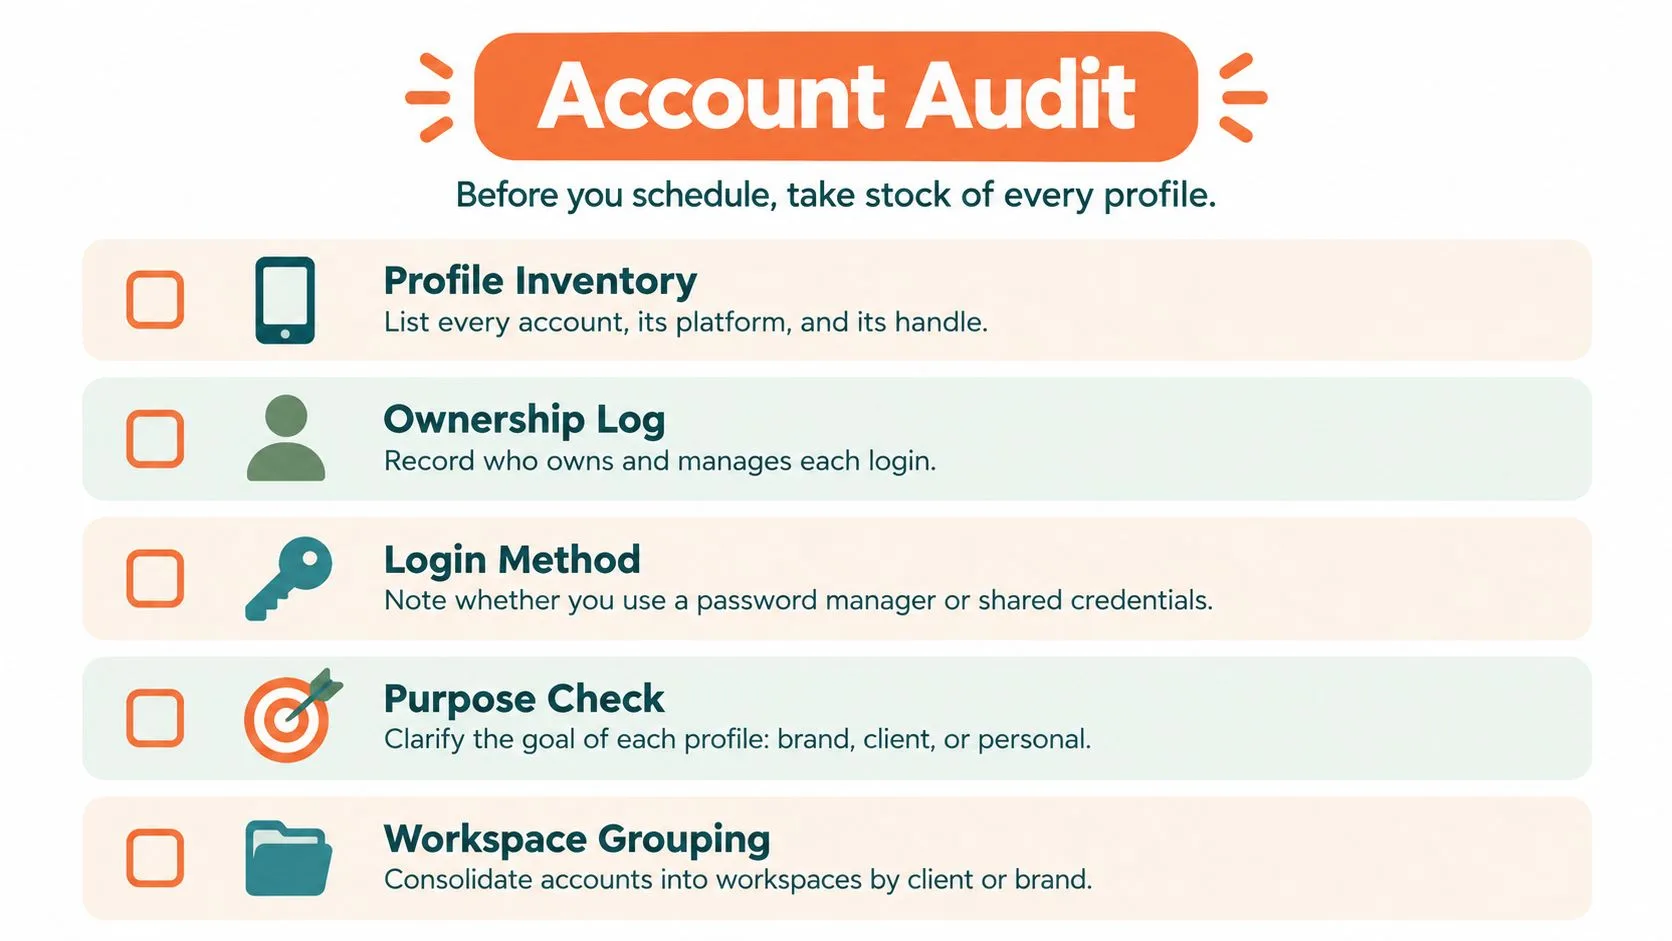
Start with a complete inventory. Search your password manager, business manager accounts, native platform settings, old campaign documents, and client onboarding files. Record the platform, handle, profile URL, account type, active status, audience purpose, and current owner. Include dormant or uncertain profiles rather than assuming they don't matter. An abandoned account can still confuse customers or appear in search results.
Build an account map that people can use
An account map shouldn't live only in one manager's head. Give every profile a row and use consistent fields so another team member can understand it without a meeting.
| Field | What to record |
|---|---|
| Profile identity | Platform, handle, URL, and account type |
| Business purpose | Brand, client, support, recruiting, community, or personal |
| Ownership | Legal or business owner, day-to-day manager, and approver |
| Access | OAuth connection, password manager record, or platform admin path |
| Workspace | Client or brand grouping used for planning and reporting |
| Publishing status | Active, paused, archived, or under review |
| Notes | Regional rules, content restrictions, or special approval needs |
The purpose field deserves careful attention. Two profiles for the same brand may serve different audiences or jobs, while a client may have an account that no longer supports a meaningful objective. Don't schedule content because a profile exists. Decide whether each account earns a place in the operating system.
Clean access before you connect tools
Use platform authorization and OAuth connections wherever available rather than circulating shared passwords through chat or email. Donivo's publisher information states that connected accounts use OAuth and that passwords aren't stored by the platform. If a platform doesn't support the access path you need, document the approved credential location and the person responsible for maintaining it.
Remove former employees and contractors from account access, review administrator roles, and record who can publish without approval. Separate creator, approver, and publisher responsibilities when a campaign carries reputational or compliance risk. A team doesn't need to make every person an administrator just because several people contribute content.
Group work by client or brand
Create workspace names that remain clear in a calendar, approval notification, and report. A structure such as Client | Brand | Region is easier to scan than labels based on a staff member's name or an internal nickname. Use a matching campaign convention, such as Brand | Product | Season, so assets, drafts, links, and reports can be found together.
Run this short audit before scheduling:
- Find every profile: Confirm the handle, platform, status, and purpose.
- Confirm ownership: Name the business owner and the person accountable for daily management.
- Verify access: Check authorization, administrator roles, and credential storage.
- Remove clutter: Archive duplicate, dormant, or purposeless accounts after approval.
- Create workspaces: Group active profiles by client, brand, or operating unit.
- Test identity: Open each connected account and verify that the displayed profile matches your register.
A practical social media checklist can turn this audit into a repeatable onboarding step instead of a one-time cleanup exercise.
Choose and Configure a Centralized Scheduler That Fits Your Workflow
The right scheduler depends on the work you need to control. Native platform tools are useful when one team owns one network and needs access to features that third-party tools may not support. A centralized scheduler earns its place when you manage several profiles, coordinate approvals, reuse campaign assets, or need one view of what is due.
Compare the options by operational fit rather than by feature count.
| Approach | Works well when | Trade-off |
|---|---|---|
| Native platform tools | One platform has specialized publishing or editing needs | Planning and reporting stay fragmented |
| Centralized composer | Several networks share a campaign or publishing queue | Platform-specific features may require a native follow-up |
| Queue-based scheduling | You publish recurring content in predictable categories | It can hide campaign sequencing if used without a calendar |
| Calendar-based scheduling | Dates, dependencies, launches, and approvals matter | It requires more planning discipline |
A centralized composer can support Facebook, Instagram, X, YouTube, TikTok, LinkedIn, Threads, and Bluesky from one planning surface, but the tool should still let you adapt each post for its destination. A single caption copied everywhere often sounds unnatural, and a single asset may not fit every placement.
Configure the system around decisions
Connect accounts through OAuth, then verify each connection by checking the selected profile name and permissions. Don't assume a successful connection means the correct account is active. Make the first test post something low-risk, and confirm the result on the native platform.
Choose a queue for recurring categories such as educational tips, community prompts, or evergreen resources. Use a calendar for launches, announcements, seasonal work, and campaigns with fixed dependencies. The strongest workflows use both. The queue handles repeatable supply, while the calendar controls the moments that must happen in a particular order.
Configure these settings before filling the system:
- Time zone: Set the workspace or account time zone deliberately, especially when clients operate in different regions.
- Publishing slots: Create recurring windows only where they reflect an actual content rhythm.
- Platform variants: Give each network its own caption, call to action, media choice, and link treatment when needed.
- Media behavior: Check how the scheduler handles video, image crops, alt text, thumbnails, and unsupported formats.
- Failure handling: Turn on automatic retries and email notifications when the platform supports them.
- Capacity limits: Review workspace, account, and monthly post limits before migrating a large content library.
Automation should remove repetitive handling, not remove judgment. For a broader overview of ways to save time with content automation, focus on tasks such as scheduling, reporting, and first-draft preparation while keeping final approval with a person who understands the account.
Run a controlled trial
Don't migrate every campaign on the first day. Connect the accounts, schedule a small set of varied posts, and observe the full path from draft to live verification. Check the queue order, approval notifications, time-zone behavior, media rendering, and failure alerts. Then adjust the workflow before the team depends on it.
Use a comparison of 21 social media scheduling tools to structure your evaluation, but judge every option against your own account map and approval process. A scheduler that looks powerful in a feature list can still create friction if its workspaces, permissions, or publishing behavior don't match how your team operates.
Build Calendars Queues Templates and Asset Libraries That Scale
A calendar should answer more than “what are we posting?” It should show why the post exists, which audience it serves, where it goes, who owns the next action, and what must happen if the plan changes. Without those fields, a calendar becomes a list of dates that still leaves the team guessing.
Start with a master calendar for campaigns and a working view for daily production. Mark each item with a content purpose, format, platform, draft status, owner, approver, scheduled time, destination link, and final asset location. Keep evergreen content separate from time-sensitive work so a delayed campaign doesn't accidentally push a routine post into the wrong slot.
Give queues a job
Queues work best when each one has a clear content category. A brand might maintain separate queues for education, product context, customer stories, community prompts, and evergreen resources. The categories should reflect the strategy, not just the file type.
A queue becomes dangerous when it acts as a storage bin for anything approved. Before adding an item, label the intended platform, audience, expiry condition, and reuse rule. A seasonal announcement shouldn't remain available for indefinite recycling, while a timeless explainer may need a refresh date before it returns.
Your calendar needs room for unscheduled work too. Keep space for customer questions, timely announcements, and creative ideas that don't belong in a prefilled queue. Scheduling everything can make a brand consistent but unresponsive.
Build templates with controlled variation
Templates should reduce blank-page work without making every account sound identical. Create a structure for recurring formats, then define which elements can change:
- Hook: The opening idea or audience problem.
- Proof: The example, observation, product detail, or explanation.
- Action: The next step you want the reader to take.
- Platform adaptation: The length, tone, formatting, and media treatment for each network.
- Review fields: Source link, campaign tag, approval status, and expiry note.
Use a naming convention that reveals the format and intended use, such as Brand | Education | Short Video | Organic. Store the editable source, export, caption, and approval note together. This keeps a designer from editing the wrong version and gives the publisher enough context to make a safe change.
Nim's SMM templates for marketers can provide a starting point for recurring formats, but adapt any template to the brand's voice, audience, and approval rules rather than publishing it unchanged.
Treat assets as production files
Create folders or library labels for approved, in review, expired, and source assets. Add usage rights, campaign names, dimensions, and expiration details where relevant. A clean library makes handoffs faster because the next person doesn't need to inspect every file to determine whether it's approved.
Use platform-aware dimensions during export. Instagram feed posts commonly use 1080 × 1080 pixels for square images and 1080 × 1350 pixels for portrait images, while Stories and Reels commonly use 1080 × 1920 pixels. ( Sprout Social's social media image sizes guide) Facebook shared-post images commonly use 1200 × 630 pixels for or link-preview formats, with 1080 × 1080 pixels also widely used for square feed posts. ( Constant Contact's official image-size guidance)
Before approval, preview the post at the destination, inspect the crop, test the link, and confirm the final file. Add UTM parameters consistently when traffic attribution matters. The social media content calendar should show these production details, not just the publication date.
Monitor Engagement Analyze Performance and Optimize Timing Per Platform
A multi-account report becomes useful when it helps someone decide what to do next. A dashboard full of raw totals can make a large account look healthy because it has a larger audience. Compare normalized signals across accounts, then connect those signals to outcomes that matter to the business.
A practical operating baseline uses three review rhythms. Conduct a daily five-minute anomaly check, a weekly 30 to 60-minute cross-account analysis, and a monthly two to three-hour reporting cycle, as outlined in independent guidance for multi-account analytics. ( Multi-account social media analytics workflow)
Use a portfolio view
The daily check should look for exceptions, not explain the entire account. Review failed posts, sudden reach changes, broken links, unusual comment activity, missing media, and messages waiting for an owner. Record the issue and assign a follow-up instead of trying to solve every problem during the scan.
The weekly review should compare accounts using measures that remain meaningful across different audience sizes:
- Engagement rate per post: Compare the response generated by individual posts rather than relying only on total interactions.
- Follower growth rate: Track the direction of audience change relative to the account's own history.
- First response time: See whether the team is responding quickly enough for the account's role.
- Share of voice: Assess how visible the brand is within the relevant conversation.
- Conversions: Connect social activity to the defined business action.
Use a trailing 90-day baseline when reviewing changes, and separate channel-level signals from business outcomes. A reach increase may not create qualified traffic, while a modest post can support a meaningful conversion. End every review with 3 to 5 concrete actions, such as changing a format, revising a hook, moving a publishing window, or retiring a weak queue.
Make timing a test, not a superstition
Each platform has different audience behavior and content expectations, so don't copy one account's publishing window across every network. Start with the account's own history, test a limited change, and compare the result against the established baseline. Keep the content type consistent enough that you can tell whether timing or creative caused the difference.
For a current framework on timing variables and platform-specific considerations, Sup's 2026 social media timing guide is a useful companion. Treat any recommended window as a hypothesis, not a permanent rule. Audience behavior changes when the content mix, geography, campaign, or platform distribution changes.
Free utilities can make the review more practical. Use a Best Time to Post tool to generate timing hypotheses, an Engagement Rate Calculator to normalize comparisons, and a Social Post Preview to catch layout problems before publishing. Donivo's Engagement Rate Calculator fits into that workflow, but the calculation only helps when the team defines the same measurement method across accounts.
Troubleshoot Failures Prevent Mistakes and Keep Publishing Reliable
Reliable publishing depends on recovery, not on pretending failures won't happen. The common problems are predictable: a scheduled post fails, the wrong account is selected, an image is rejected, a video renders incorrectly, or a time-zone setting shifts the publication window.
Create a short incident path for each failure. Check the scheduler notification, inspect the post status, confirm the selected account, review the media and caption against platform requirements, and decide whether to retry, edit, or publish natively. After the post goes live, verify it on the platform itself. A successful scheduler status isn't a substitute for checking an important campaign post.
Make handoffs visible
Most team errors happen between people rather than inside the composer. A writer assumes the approver reviewed the latest version. The designer exports a replacement file without updating the draft. The publisher sees an approved caption but misses a note that the campaign was paused.
Use explicit states such as Draft, Needs edits, Awaiting approval, Approved, Scheduled, Published, and Needs recovery. Assign one owner to move the item forward, and keep the approved caption and asset together. Version names should identify the campaign and revision so nobody has to guess which file is current.
Run this weekly reliability check:
- Access: Confirm key account connections and responsible owners.
- Queue: Remove expired posts and verify the next scheduled items.
- Approvals: Clear drafts with unclear status or missing sign-off.
- Assets: Check dimensions, links, permissions, and expiration notes.
- Failures: Review retries, email alerts, and posts requiring manual recovery.
- Learning: Record one timing, format, or workflow adjustment for each account that needs attention.
The operating loop is simple: plan, approve, publish, verify, review, and adjust. That loop gives a team enough structure to manage several accounts without turning every morning into an emergency.
Donivo provides centralized planning and publishing across multiple social networks, with queue and calendar scheduling, workspaces, OAuth account connections, and automatic retry notifications for failed publishes. Visit Donivo to connect your accounts, organize the workflow, and replace scattered app switching with a publishing system your team can verify and maintain.