How to Schedule Tweets on X (Twitter): A Complete 2026 Guide
·Updated ·15 min read

You have written a week's worth of posts, checked the copy, and then realized every post is still sitting in your notes. Or you are ready to publish from your phone, but the scheduling option you expected is not there. Learning how to schedule tweets on X (Twitter) means more than finding a calendar icon. You also need to know where native scheduling works, where it stops, and how mobile, threads, media, timing, and failed publishes affect a reliable workflow.
The short answer is simple: use X's web composer for an occasional standalone post on one account. Use a third-party scheduler when the job includes several accounts, networks, recurring campaigns, approvals, or a shared publishing workflow. The sections below show both paths and the checks that keep a scheduled post from becoming a missed post.
Choose between native X scheduling and a third-party tool
Native scheduling is usually enough when you manage one account, publish occasional standalone posts, and do not need to coordinate content across other networks. You compose directly on X, attach media, choose a date and time, and leave the post in X's own scheduled area.
A multi-platform tool makes more sense when your workflow includes several accounts, recurring campaigns, approvals, shared calendars, or versions for Facebook, Instagram, LinkedIn, TikTok, YouTube, Threads, and Bluesky. The trade-off is another account connection and another service to monitor when a post does not publish.
| Workflow need | Native X composer | Third-party scheduler |
|---|---|---|
| One-off X posts | Direct and simple | More setup than necessary |
| Several networks | Separate publishing workflows | Centralized composer and calendar |
| Recurring campaigns | Basic queue management | Queue slots and recurring schedules may be available |
| Team review | Limited platform-native coordination | Some tools include drafts and approvals |
| Thread planning | Full reply-chain scheduling is limited | Support depends on the tool and publishing method |
| Failure recovery | Monitor the X queue yourself | Some tools provide retries and alerts |
For a wider comparison of scheduling workflows and capabilities, read the social media scheduling tool alternatives. Choose the native route for a focused X queue. Choose a scheduler when the problem is coordination, not merely delayed publishing.
Schedule tweets with the native X web composer
X's current Help Center places scheduling in the web composer. Open X in a browser, start a new post, write the copy, attach any supported media, and then select the calendar icon. The current X Help instructions also explain how to reach drafts and scheduled posts through Unsent posts.
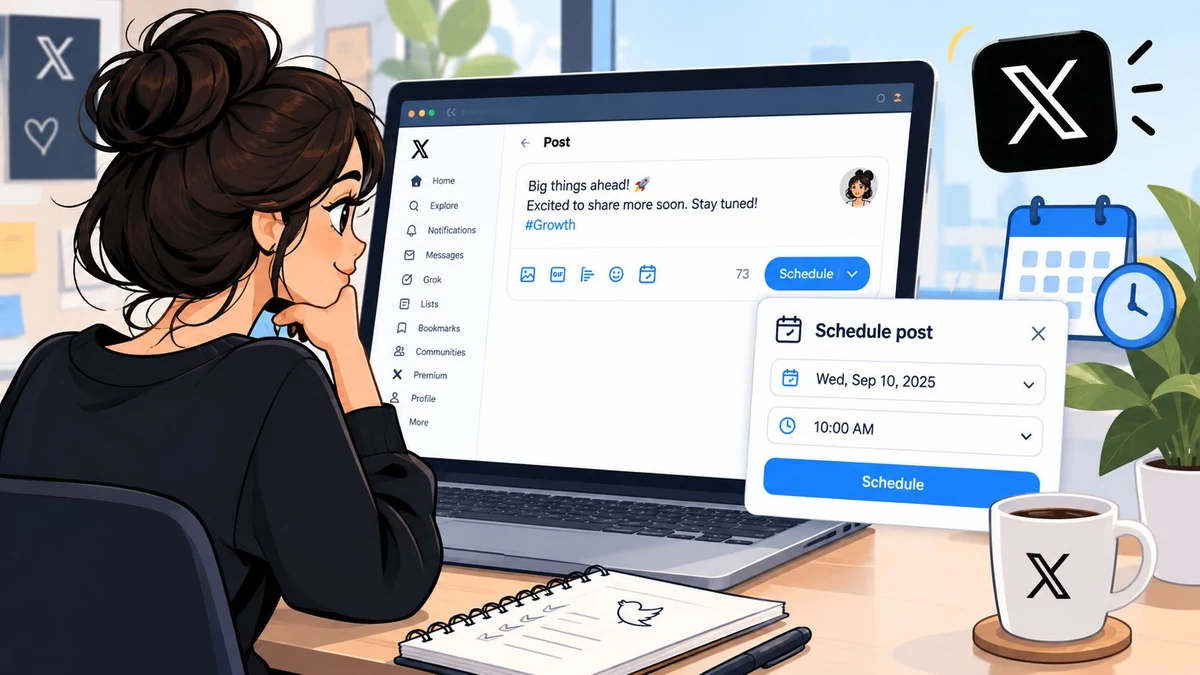
- Open the X web composer. Sign in to X in a desktop browser and select Post to open the composer.
- Create the post. Write the post and add supported media, keeping a standard post within 280 characters and four total media items.
- Open the scheduling control. Select the calendar icon at the bottom of the web composer.
- Choose the date and time. Choose the publication date and time, check the timezone, and select Confirm.
- Schedule the post. Select Schedule to place the post in the future queue.
- Review and verify the scheduled item. Open Unsent posts and the Scheduled tab to check the account, copy, media, time, and available edit or delete controls.
X's standard post limit is 280 characters. Its current Help Center also describes up to four total media items, including photos, a GIF, or a video. Premium longer posts are a separate feature, so do not assume a scheduler supports them unless its own composer says so.
Review, edit, or remove a scheduled post
Open the composer again and select Unsent posts, then open the Scheduled tab. Check the account, date, time, timezone, copy, links, and media before the slot arrives. If the current interface does not offer the edit you need, remove the scheduled item and create a corrected version.
X's scheduled posts guide describes a separate X Ads workflow for scheduled organic and promoted-only posts. Treat its Composer and Posts controls as Ads-specific instructions, not as a promise that every organic web composer has the same labels.
Independent 2026 coverage suggests that native planning may reach as far as 18 months in some interfaces, while also noting that full-thread scheduling is not part of the native tool. Read the independent guide to scheduling tweets as context, then trust the date range and controls shown in your current account.
Can you schedule tweets on mobile?
X's current Help Center lists the calendar step under its web instructions. The iOS and Android steps on that page do not document the same scheduling control. If you do not see it in the app, use X in a desktop browser or connect a scheduler with a mobile-friendly workflow.
Third-party API guidance also notes that the standard X API v2 does not expose a simple scheduled_at field or native scheduling endpoint. That is an integration constraint, not proof that every tool uses the same implementation. See the mobile and API scheduling discussion for that independent explanation.
Use a third-party scheduler for multi-network workflows
A third-party scheduler earns its place when the publishing problem spans more than one X account or more than one network. Instead of opening separate composers, you work from one publishing workflow, select the destination profiles, adapt the copy for each platform, and review the campaign as a whole.
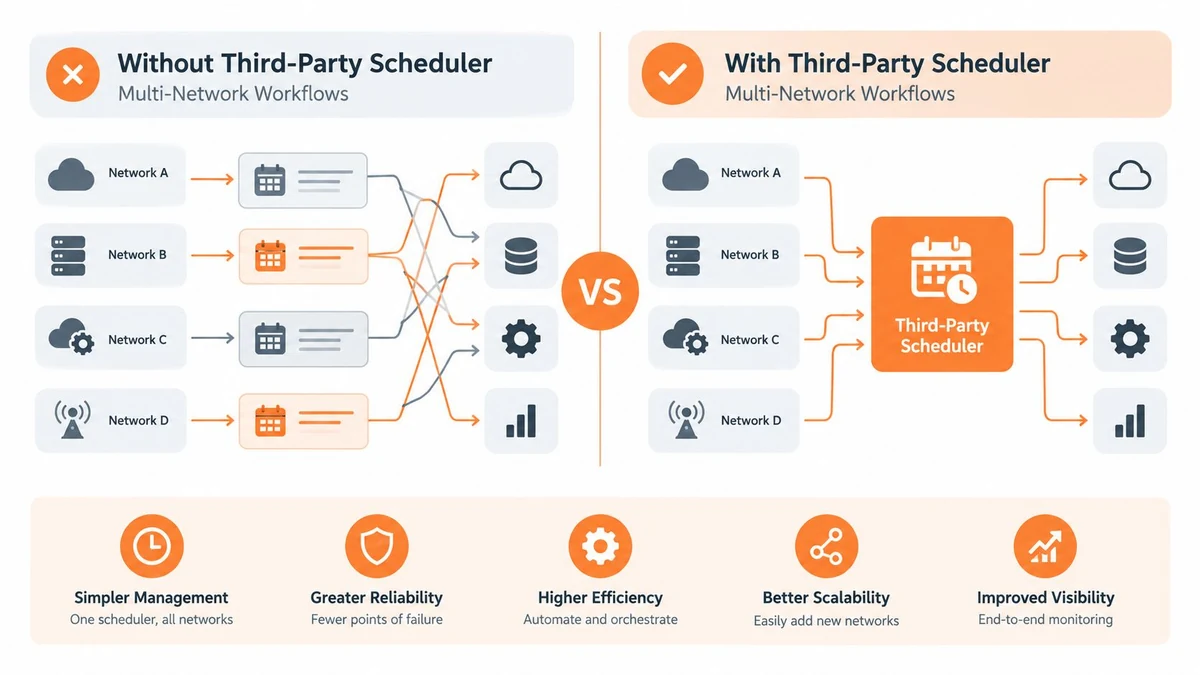
That makes the scheduler an orchestration layer for content, accounts, timing, and delivery status. For another perspective on structured content planning, see Hooked's content scheduler. Compare the workflow you actually need rather than choosing the tool with the longest feature list.
Build a platform-aware process
- Connect accounts securely. Use OAuth rather than sharing social-network passwords with a scheduling service.
- Create the campaign. Draft the core idea and identify the networks that should receive a version.
- Adapt each version. Adjust wording, media, links, and calls to action for the selected platforms.
- Review the schedule. Check spacing, duplicate messages, account selection, and campaign sequencing.
- Monitor delivery. Use status notifications and retry information instead of assuming every scheduled job succeeded.
Donivo supports OAuth connections and publishing across Facebook, Instagram, X, YouTube, TikTok, LinkedIn, Threads, and Bluesky. It publishes automatically, retries failures, and alerts you when a post needs attention. X connections require a paid plan, while the account can be created without a credit card.
If managing several profiles is the main challenge, read the guide to scheduling across multiple accounts. The right tool is the one that removes the manual work your current process repeatedly creates.
Scheduling threads and attaching media
A standalone post and a thread are different operational jobs. X's native scheduler can place an individual post into a future queue, but it does not turn several independent posts into a reply chain. If your message needs connected posts, choose between a manual workaround and a tool that explicitly supports thread sequencing.
The simplest native workaround is to schedule the opening post and publish the replies manually when it is live. That keeps you responsive to the conversation, but it also creates a timing risk. You can prepare the parts with the thread splitter, check that each part makes sense on its own, and then use a workflow that explicitly supports linked replies.
- Continuity: each post should lead naturally into the next.
- Standalone clarity: readers may encounter a reply before the opening post.
- Media placement: put each image or video where it supports the specific point.
- Recovery plan: know whether a failed post pauses the sequence or lets later posts continue.
X's current attachment guidance allows up to four total media items in a standard post. Upload media early enough to preview the crop, confirm that the attachment remains associated with the scheduled draft, and check the final post after publication. A text payload can succeed while an attachment fails.
Time scheduled tweets for testing, not guesswork
Timing works best as a testing process rather than a permanent answer copied from a generic chart. Independent 2026 guidance identifies Tuesday through Thursday, 8 to 11 a.m. local time as a useful starting window, while broader weekday activity from 8 a.m. to 4 p.m. is also described as useful across large datasets. The same guidance references large engagement datasets, so treat those windows as a baseline, not a guarantee for your audience. Read the independent 2026 timing and limits guidance for that context.
- Select baseline slots. Start with two times inside a consistent weekday window.
- Hold the format steady. Compare similar post types rather than mixing a video with a short text update.
- Track meaningful outcomes. Review impressions and engagement per post, not only total activity.
- Change one factor. Adjust the day or time only after the first comparison.
- Keep a live-content buffer. Leave room for replies, timely observations, and events that should not be automated.
The Best Time to Post on X tool can help you choose starting slots, but your own account data should decide which times remain.
Practical rule: a reliable publishing window beats a theoretically perfect time that your workflow cannot maintain.
Pace the queue around platform limits
A third-party platform guide reports an X daily ceiling of 2,400 posts, divided into smaller semi-hourly intervals. Treat that as independent operational context, not an official guarantee for every account or API plan. A large batch should not be released as one burst just because the daily total appears safe. See the third-party X platform limits guide for the cited discussion.
A legacy X developer rate-limit page is also included as a historical pointer, but it currently redirects to the developer home. Do not use it to support a precise current limit. Use queue-based pacing, per-user throttling, and retries instead of sending a large batch at once.
Troubleshoot failed publishes and platform limitations
A scheduled post can fail even when the draft looked correct. Start with the publish record, classify the problem, and fix that specific path instead of repeatedly pressing Schedule.
- Authentication expired: reconnect the X account through OAuth, then check whether the failed post can be retried without creating a duplicate.
- Media upload failed: confirm whether the attachment appeared, then retry with the original asset if the text went live without it.
- Rate limiting occurred: reduce the batch, spread jobs across the day, and inspect both account-level and application-level responses.
- Timezone was wrong: compare the scheduler timezone with the audience timezone before rebuilding the queue.
- The post was rejected: review the text, link, and media against the current rules, then create a corrected version rather than resubmitting the same payload.
- The content went stale: recheck links, claims, context, and sensitive-event language if the post has been waiting in the queue.
X post preflight checklist
- Confirm the right X account is selected, especially when you manage several brands.
- Keep the standard post at or below 280 characters. Use the character counter before scheduling.
- Check the media count, file size, duration, and format against the scheduler's current limits. For static media, check the X post image size guide. For clips, use the X video dimensions guide before you queue the post.
- Open every link and check the preview instead of assuming yesterday's draft is still current.
- Verify the date, time, and timezone, then confirm the item appears in the intended queue.
- Review the live post after publication. A successful API response does not replace a visual check.
Choose the method that matches the job
Use X's web scheduler when one X account is the whole job. Use a multi-platform workflow when you maintain several account queues and need to tailor one idea without copying it between apps. The broader social media scheduling guide explains that decision across all eight networks Donivo supports.
Before you schedule, choose the privacy setting that matches the audience you intend to reach. Read the guide to making an X account public or follow the separate steps for making an X (Twitter) account private. Both guides keep the privacy task separate from scheduling.
For a broader review of automation risks, read social media automation risks. The safest setup combines a checked queue, clear notifications, controlled pacing, and a human review step before sensitive or time-dependent content goes live.
Donivo lets you connect X and other social accounts through OAuth, create platform-aware posts, schedule them, and receive retry or email notifications when publishing fails. If you are ready to replace disconnected manual queues with one practical workflow, visit Donivo and start your publishing process.